One of the most iconic Polish dishes are pierogi. Yes, it’s “are” not “is” because the world is simply a plural form (singular is 1 pieróg – and the “ó” vowel is … never mind). So the good news is you will be served more than one piece of food. Pierogi always come in a bunch.

These delicious dumplings are a staple in traditional Polish. While there are many variations of pierogi fillings (raging from meat to fruit) the key to making perfect pierogi lies in the dough. In this blog post, I will try to guide you through the process of making dough for authentic Polish pierogi. Bear in mind this is sort of standard way. Many Polish cooks, chefs, and YouTube celebrities have their own ways of achieving perfection in this respect. Well, you just need to try.
1: The Ingredients
You will need flour, eggs, water, salt, and butter. It is important to use good quality flour, preferably all-purpose flour, for the best results. You can also add a pinch of sugar to the dough for a slightly sweeter taste.
2: Mixing the Dough
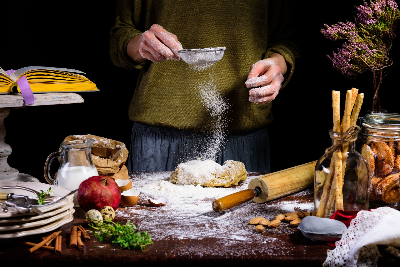
In a large mixing bowl, combine the flour, salt, and sugar (if using). Make a well in the center and crack in the eggs. Slowly mix in the flour from the sides, gradually adding water until the dough comes together. Knead the dough for about 10 minutes until it becomes smooth and elastic. If the dough is too sticky, add a little more flour. If it is too dry, add a little more water.
3: Resting the Dough
Once the dough is kneaded, cover it with a damp cloth and let it rest for at least 30 minutes. This will allow the gluten to relax and make the dough easier to work with. You can also refrigerate the dough for up to 24 hours if you are not ready to use it immediately.
4: Rolling and Shaping the Dough
After the dough has rested, divide it into smaller portions and roll them out on a floured surface. The thickness of the dough should be about 20mm. Use a round cookie cutter or a glass to cut out circles of dough. Place a small spoonful of filling in the centre of each circle and fold the dough over to create a half-moon shape. Pinch the edges to seal the pierogi.
5: Cooking the Pierogi
To cook the dumplings, bring a large pot of salted water to a boil. Gently drop in the pierogi and cook for about 3-4 minutes until they float to the surface. Remove them with a slotted spoon and place them in a pan with melted butter to prevent them from sticking. You can also fry the pierogi in butter for a crispy exterior.
Well, it doesn’t look that complicated. My experience shows that the most difficult bit is getting the right thickness of the dough in relation to its elasticity, so it doesn’t break while cooking. Then another “sticky” point is when you’re binding the edges together. Simple as it may seem, that takes a bit of conscious precision work, cause otherwise, the “buggers” break again. Still, it is not that difficult and with some practice and experimentation, you can get it right.
If you don’t want to do it yourself, look for some ready-made pierogi in your local Polish shops or restaurants. Try them and you will love them. Well, if you don’t, try different fillings. Andy then another one. You’ll finally find pierogi with your name on them.

